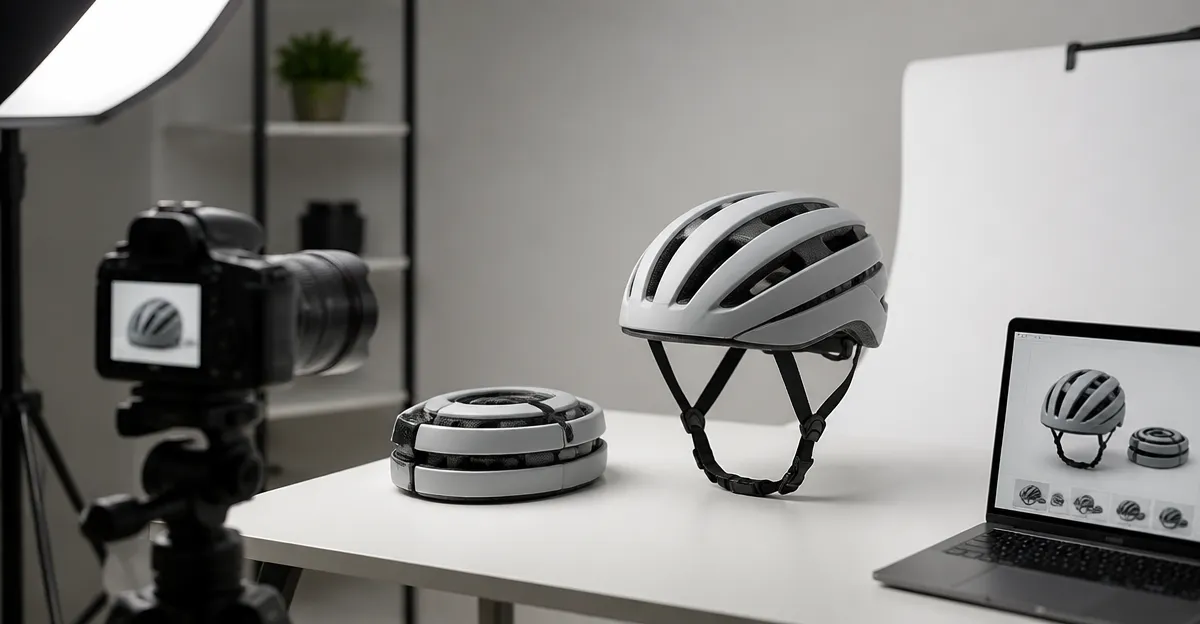
How to Photograph Foldable Helmets for Online Sales: Create High‑Converting Product Photos
Introduction
In the competitive world of e‑commerce, a single image can determine whether a customer adds a foldable helmet to their cart or scrolls past. This guide teaches the reader how to produce clear, compelling photographs that highlight safety features, portability, and style. By following the steps, one will understand lighting fundamentals, composition techniques, and post‑production workflows that increase click‑through rates and conversions.
The methods described are applicable to any foldable helmet, yet specific product examples illustrate how each tool enhances the process. Whether the photographer is a seasoned professional or an enthusiastic seller, the instructions balance technical depth with practical accessibility.
What You’ll Need
- Digital camera with manual controls (mirrorless or DSLR)
- Tripod for stability
- Softbox or LED panel for diffused lighting
- Plain white or light‑grey backdrop
- Reflectors or white foam boards
- Cleaning cloth to remove fingerprints
- One of the foldable helmets listed below for demonstration
All of the helmets mentioned are available on Amazon and include features that make them ideal subjects for photography.
Step 1: Set Up Controlled Lighting
Consistent, soft lighting eliminates harsh shadows and reveals the helmet’s surface texture. Position a softbox at a 45‑degree angle to the front of the helmet, and use a second light or reflector opposite the main source to fill in shadows. Set the lights to a color temperature of 5500 K for neutral daylight balance.
When photographing a helmet with built‑in LED lights, such as the FEND Super Plus, turn the LEDs on low‑intensity mode to demonstrate functionality without overexposing the image. The Super Plus provides 30‑lumen front and rear lights, which can be captured as a secondary selling point.
Why this matters: Proper lighting showcases the polycarbonate shell and EPS foam of the Closca Foldable Bike Helmet, allowing potential buyers to assess build quality. A well‑lit image also improves the perceived value, encouraging higher conversion rates.
Step 2: Prepare the Helmet for Shooting
Before the camera clicks, ensure the helmet is clean, fully unfolded, and adjusted to its intended size. Use a microfiber cloth to wipe away dust, then lock the folding mechanism so the helmet remains rigid during the shoot. For helmets that feature removable accessories, such as the visor on the Closca Folding Helmet with Visor, attach the visor to demonstrate the complete package.
Adjust the rear elastic bands of the Closca Foldable Bike Helmet to a snug position, then lock the bands. This step highlights the helmet’s adjustable comfort system, a key feature for buyers who value a personalized fit.
Why this matters: A clean, properly positioned helmet communicates professionalism and attention to detail. Showing the adjustable rear system and removable visor reassures shoppers that the product is versatile and user‑friendly.
Step 3: Capture Multiple Angles and Functional Shots
Begin with a straight‑on shot that fills the frame, allowing the viewer to see the helmet’s overall silhouette. Follow with a 45‑degree side view to illustrate the folding hinge and the thin profile when collapsed. For the Overade Plixi, demonstrate the three‑second folding action by photographing the helmet before and after collapse.
Next, create a close‑up of the ventilation system and the padded interior. Use a macro lens or the camera’s close‑focus mode to capture the breathable vents on the Closca Foldable Bike Helmet. Highlight the removable cap on the Plixi, which offers sun and rain protection.
Finally, photograph the LED lights on the FEND Super Plus in both steady and flash modes. Capture a night‑time scene or use a dark backdrop with a long exposure to illustrate the 800‑meter visibility claim.
Why this matters: Providing a comprehensive visual story reduces uncertainty. Shoppers can see how the helmet folds, how the ventilation works, and how the lights perform, which directly influences purchase confidence.
Step 4: Edit and Optimize Images for the Web
Import the RAW files into editing software such as Adobe Lightroom or a free alternative like Darktable. Adjust exposure, contrast, and white balance to maintain true colors; the Closca helmets are available in white, reflective silver, and matte black, and accurate representation is essential.
Crop each image to a 1:1 aspect ratio for consistency on Amazon’s product page. Export the final files as JPEGs with a resolution of 1500 × 1500 pixels and a file size under 2 MB to meet marketplace guidelines.
Apply a subtle vignette to draw attention toward the helmet’s center, but avoid excessive darkening that could hide details. Finally, add a watermark with the brand name for protection if the images will be used on a personal website.
Why this matters: Optimized images load quickly, improve SEO, and comply with platform requirements. High‑quality visuals paired with accurate color representation increase the likelihood of conversion.
Tips & Pro Tips
- Use a white sweep backdrop to isolate the helmet and eliminate distracting elements.
- When shooting the Overade Plixi, place a ruler beside the folded helmet to visually convey its reduced volume.
- For the Closca Folding Helmet with Visor, capture the reflective visor under a slight tilt of light to showcase its safety‑enhancing shine.
- Record a short video of the folding mechanism; Amazon allows supplemental video content that can boost engagement.
- Keep the camera ISO low (100‑200) to minimize noise, especially when photographing the LED lights at night.
Troubleshooting
Problem: Shadows appear too harsh on the helmet surface.
Solution: Add a large diffuser between the light source and the helmet, or increase the distance of the light to soften the fall‑off.
Problem: LED lights cause lens flare in night shots.
Solution: Use a small flag or a piece of black card to block direct light from hitting the lens while keeping the helmet illumination intact.
Problem: Helmet folds unintentionally during shooting.
Solution: Verify that the folding lock is fully engaged; the safety mechanism on the Closca Foldable Bike Helmet prevents accidental folding when interior volume is present.
Conclusion
By mastering lighting, preparation, angle selection, and post‑production, one can create product photos that highlight the unique benefits of foldable helmets. The visual evidence of safety certifications, adjustable fit systems, and innovative LED lighting builds trust and drives sales. Implement the steps outlined in this guide, and the reader will see higher click‑through rates, reduced return inquiries, and stronger brand perception.
Products Mentioned in This Guide
Frequently Asked Questions
What lighting setup gives the best results for photographing foldable helmets?
Use a softbox or LED panel to create diffused, even light and add reflectors or white foam boards to fill shadows.
Why is a plain white or light‑grey backdrop recommended?
It isolates the helmet, highlights its details, and ensures the image looks clean and professional for e‑commerce platforms.
How can I avoid fingerprints and smudges on the helmet during the shoot?
Wipe the helmet with a lint‑free cleaning cloth before each shot and handle it by the edges or use gloves.
Do I need a tripod for product photography of foldable helmets?
Yes, a tripod provides stability, consistent framing, and allows you to use lower shutter speeds without blur.
What post‑production edits are essential for high‑converting helmet photos?
Adjust exposure, correct white balance, remove background imperfections, and sharpen key details to showcase safety features.